Make The Website Professional

Today, I am going to show you how easy it is to create a professional-looking Flash website for free.

Know To Spread The Web

So you've made a new site, huh? But no one knows about it! Here you will find tips to spread news about a website that you've created!.

The Path To Be An Expert Geek

In this website one can find many TIPS AND TRICKS of Computer,Internet,Web,Mobile And Blogger Tips.

To Increase The Knowledge Of Bloggers

In This Site We Want To Increase The Knowledge Of Bloggers About Blogging To Be A Better Blogger.

How To make Money Online With Your own Website

If you look at many websites, you will probably notice that there are banner advertisements displayed on most pages. If you are a newcomer to the scene, you might think that you must either be a company or that your site must be famous before you can get advertisers, just as it is the case in hardcopy publications..

Get our toolbar!

Saturday, January 26, 2013

Make your own portable Mandriva Flash


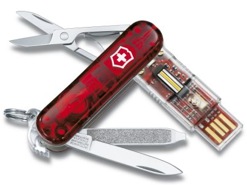
The following tutorial covers the process of creating or making your own Mandriva Flash drive. If you already have a USB flash drive, why not put it to use? The MCNLive team has done some outstanding work with their latest Mandriva based MCNLive CD releases. The persistent loop features and USB installer are nearly flawless. The persist boot option allows a user to save "ALL" system changes and settings back to the loop image file. This remastering process is fairly simple, so let's get started.

Make your own portable Mandriva Flash

Q:How to Make your own Mandriva Flash:

A: Remastering MCNLive and creating a custom ISO

Download the MCNLive Toronto ISO and burn to a CD
Start your computer from the Live CD. Select the menu option to (Boot – Mounting NTFS read-write)
Customize your desktop, add/remove programs etc to make the system how you want it
From the M button in the Panel, navigate to MCNLive-> Remaster Live
Follow the simple onscreen instructions to create your new ISO
Navigate to where you saved the remaster.iso and click it, use k3b to burn the ISO to a CD
Now restart your computer from the remastered CD

B: Making the Flash Drive

Once you have started your PC from the remastered CD, insert your USB flash drive
From the M button in the Panel, navigate to MCNLive-> Create Live USB
Follow the onscreen instructions to perform the install to USB
Again, from the M button in the Panel, navigate to MCNLive-> Create persistent loop
Follow the onscreen instructions to build the loop image file for persistence usage. Let it create this file on your USB flash drive.
Reboot your PC, setting your System BIOS or boot menu to boot from the USB device
Proceed to Boot from the USB flash drive and enjoy.
Potentially Related Portable Linux Posts
Install MCNLive Toronto to a Flash Drive in Windows
Install MCNLive to a USB Thumb Drive using the CD
Put Mandriva 2010 on a USB Flash Drive (Windows)

PRASHANT KUMAR

Monday, January 21, 2013

Cracking WiFi passwords with your Android phone


The WiFi adapter in your laptop has a special mode – monitor mode – that can be used to listen in on WiFi traffic and, with a little patience, can be used to crack a WEP password. Surprisingly, this monitor mode can’t be found on any Android device due in part to the limitations of the hardware. A group of three researchers, [Ruby], [Yuval], and [Omri], decided to spend their vacation adding monitor mode to their Android smartphones, allowing for a much more portable version of WiFi pwnage tools.

Cracking WiFi passwords with your Android phone

The phones used by the researchers – the Nexus One and Galaxy S II – used Broadcom chipsets that didn’t support monitor mode. To get around this limitation and allow the OS to see full 802.11 frames the team needed to reverse engineer the firmware of this Broadcom radio chip.

The team has released a firmware update for the bcm4329 and bcm4330 chipsets found in the Nexus One and Galaxy S II. The update may work for other phones with the same chipset, but don’t take our word on that.

There’s still a lot of work [Ruby], [Yuval], and [Omri] need to do. They’d like to add packet injection to their firmware hack, and of course create an APK to get this into the wild more easily.

If you have experience with kernel development and would like to help out, send the team an email. The source can be found at google code  if you’d like to play around with it.

PRASHANT KUMAR
Wednesday, December 5, 2012

Tuesday, December 4, 2012

Know To Create An iPhone Or Android App Without Any Coding Skills

Learning how to code and produce a basic iPhone or Android app is not a simple drag and drop process. While Apple’s Xcode helps lay down the foundation for building an iPhone app, it can take hours of coding and trial and error to produce a basic RSS feed or portfolio application.
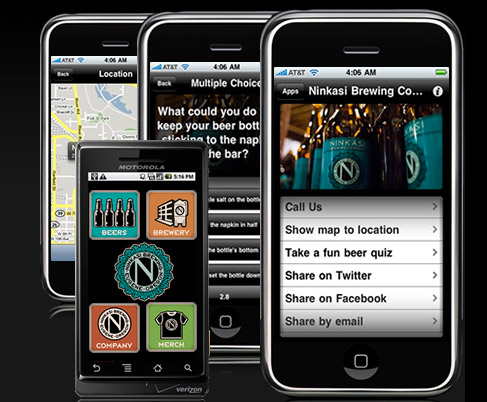
But if you’re really eager to make a mobile app based on your website, business, organization, or just a fun quiz game, a website called Buzztouch may well be the web-based solution for you. Buzztouch is essentially Content Management Software for iOS and Android. It provides a template-based process in which you import your app’s information into the online software, and in turn it will create the code that you need to compile the data for your application. I gave a try and it does work.
Know To Create An iPhone Or Android App Without Any Coding Skills


What You Need

MUO has previously covered the steps on how to develop a simple iPhone app and submit it iTunes. You should read that article as it’s part of this process. Buzztouch however does not get your app onto iTunes, nor does it compile it in the programming application, Xcode, or the Android counterpart. What Buzztouch does is help you develop your app so that you can export the code to Xcode, and then from there you go through the process of submitting your app to the iTunes App Store. Since I’m an iPhone and Mac user, this review will focus on creating an iPhone app.
The tools Buzztouch provides are totally free. It seeks to inspire aspiring developers, designers, content publishers, and the like to leverage their technology.
However, beyond Buzztouch, you will need a copy of Xcode on your Mac. If you already have a current or older free version of Xcode, you’re set to go. If not, you will have to download it from the Mac App Store, for $5. Once you get your app completed, you will need to shell out $99 for a developer’s license to upload your app to the iTunes App Store where it will go through the approval process.


Know To Create An iPhone Or Android App Without Any Coding Skills

Developing Your App

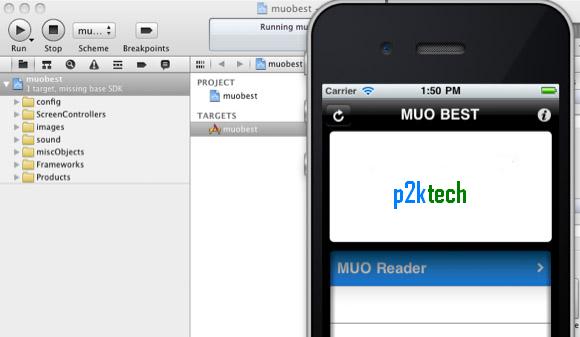
Buzztouch provides some excellent video tutorials for developing your iPhone application. I will provide simply an overview of the process. Basically, the core content of the Buzztouch app consists of one or more basic mobile iPhone template items. For example, I partially created an iPhone RSS feed app for p2ktech.com, although of course you can download the official MUO app from the App Store.
After you do the free registration on the Buzztouch site, you will need to be familiar with the tools and templates that the app creation software provides. You will need to create and gather the content for your app before you get started in the process. It’s like gathering content for producing a website. In fact, your existing website could be the basis of a web-based iPhone app. Thus a Buzztouch app could be useful for realtors, modelling agencies, small restaurants, performers, bloggers, etc.
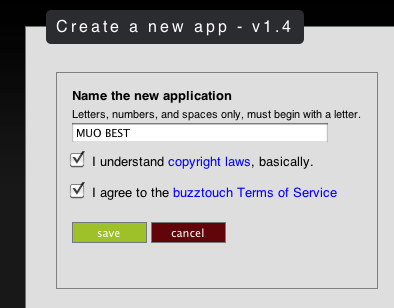
You start off the process by creating a name for your site.
Know To Create An iPhone Or Android App Without Any Coding Skills

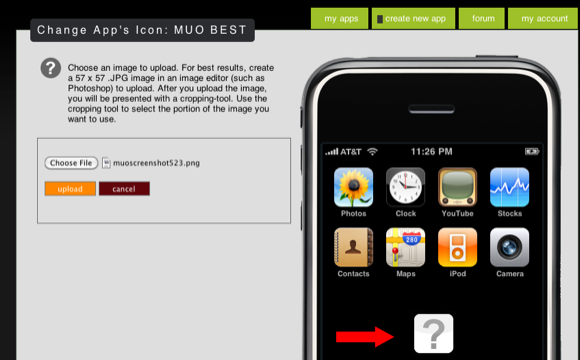
Next, you need to add a logo for your app. I borrowed one from MUO’s existing application. A professional looking logo is highly recommended for your app to have any chance of being purchased and downloaded from the App Store. As you can see, Buzztouch makes adding the icon very easy. In each step of the process, an iPhone simulation will show you the results of the content you provide.
Know To Create An iPhone Or Android App Without Any Coding Skills

As shown in the following control panel, you will need to add a homepage image and introductory information for your app. That’s very easy to do. Where it says “Manage this app’s menus & screens” is the core content of your app.
Know To Create An iPhone Or Android App Without Any Coding Skills

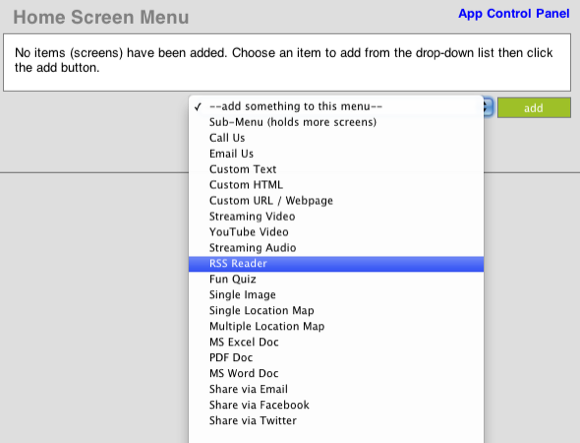
Clicking on that tool, you are provided with a set of tools for building your app. So far example, if you want to an RSS feed app for your blog site, you would add the RSS feed tool as one of your Home Screen Menu items.
Know To Create An iPhone Or Android App Without Any Coding Skills

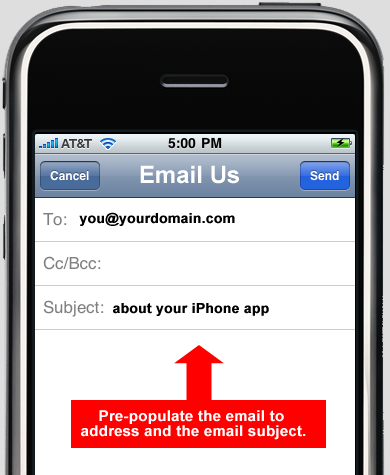
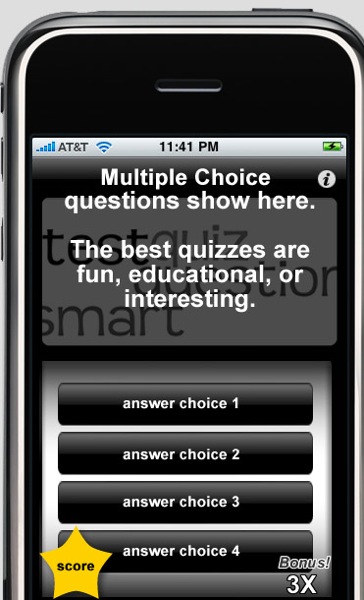
There are 20 other templates for adding items, such as a Streaming and/or YouTube video, an Email Us page, a multiple choice quiz, a single image, a PDF doc, and a share via Facebook tool.
Know To Create An iPhone Or Android App Without Any Coding Skills

As with any professional looking website, you will want to have the content of your app polished and well edited.

Compiling Code

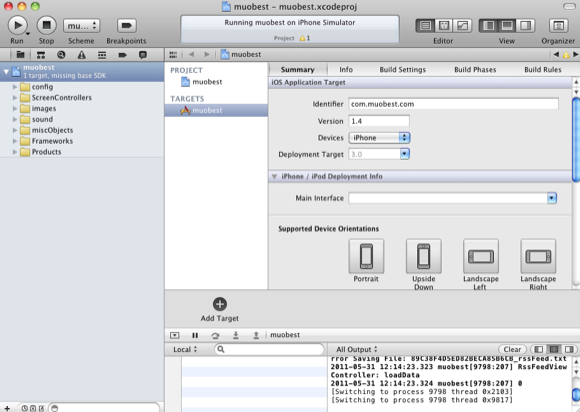
At any time during the process of building your app, you can have Buzztouch compile the code and send it over to Xcode to see the results. After Buzztouch prepares your code, it will download it to your computer. In the resulting folder, you will want to click on the file with the name of your app and the extension, “xcodeproj.” When you click the Run button in Xcode, it will open the iPhone simulator that is a part of the programmer.
Know To Create An iPhone Or Android App Without Any Coding Skills

You really don’t need programming skills to produce your application, but you do need to be comfortable with using this sort of technology.
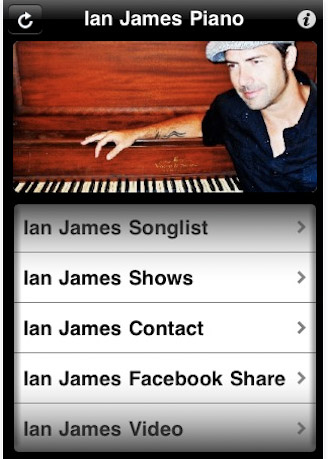
A few examples of apps developed by Buzztouch include Ian James’ Piano Live which is designed to keep his fans updated about  his live shows and other information;
Know To Create An iPhone Or Android App Without Any Coding Skills

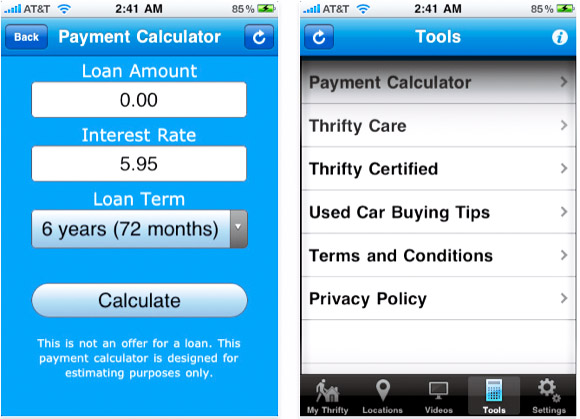
and Thrifty Car Sales, a calculator produced by Thrifty Car Sales to calculate the interest rate on a car loan, as well as other tips for buying a car.
Know To Create An iPhone Or Android App Without Any Coding Skills

Let us know what you think of Buzztouch. If you create an app and post it for free download on the App Store, let us know about it. We might consider reviewing it as a follow-up to this article.

Tuesday, October 23, 2012

Know To Create Your Own Portable App For A Flash Drive


Know To Create Your Own Portable App For A Flash Drive
Over the past few years, USB thumb drives have become very popular. They transfer files relatively fast (compared to CD’s), happen to be extremely small and unobtrusive, and plug into almost any computer with a USB port.

Personally, I have two flash drives on my keychain right now, and I can’t imagine how I ever got by without them. Thanks to the convenience of the modern thumb drive, I can copy documents or other important files onto a small drive that fits in a change pocket, and transfer them to another computer. This is in fact, what most people do with thumb drives–nothing special so far.
Using your flash drive as a backup and transfer device is great–but you haven’t really unlocked the potential of the USB until you’ve installed some programs on it.

Sites like PortableApps actually have pre-packaged applications that you can install directly to your USB drive. These apps, games, and utilities will run from your USB stick when you plug it into a computer(provided that they’re on the operating system the programs run on). Aibek compiled an excellent list of 100 Portable Apps for your USB Stick that I would recommend checking out if you’re looking for pre-packaged programs to put on your thumb drive.
So, you found a really cool application and there was no pre-packaged version of it anywhere on the internet that would install it to your USB drive. Looks like it’s time to learn how to create a portable app for flash drive. Please note: I’m not referring to U3 flash drives; that’s a different ballgame in several ways (even though they can be used much the same way).

The example application I’m going to make portable is Audacity, an open source audio editing program. You can download your own file, or follow along using Audacity (recommended for your first time) before you try this method on your own applications.

Step 1: Download the application setup file

If you’re following along, download the Audacity installation file. Make sure this download is relatively isolated or things will get confusing later.

Step 2: Download Universal Extractor and WinRAR

Download Universal Extractor and a program such as WinRAR. Install both programs–we need both to make this work. Make sure you allow both programs to associate with their respective file-types, and restart the computer if prompted–better safe than sorry. I didn’t need to restart, but it couldn’t hurt.

Step 3: UniExtract the Setup file

Know To Create Your Own Portable App For A Flash Drive

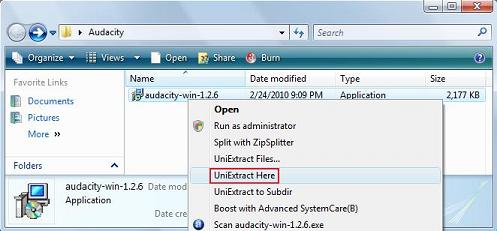
Right click your downloaded setup file (in my case, it’s Audacity) and click “UniExtract here”. Go ahead and specify a folder that you would like to extract the setup file to. A folder will be created with the extracted files inside. Open up that folder for the next step.

Step 4: Find the EXE file that runs the program

In that extracted folder, look for the .exe file that runs the program. It’s pretty easy to spot and usually has the same name as the program you’re trying to install. For instance, in my case, the .exe is named “audacity.exe”. Double click the file and verify that it runs the program successfully.

Step 5: Pack all the files into an archive


Highlight every file in that folder, right click on them, and click “Add to archive” in the contextual menu.

Know To Create Your Own Portable App For A Flash Drive

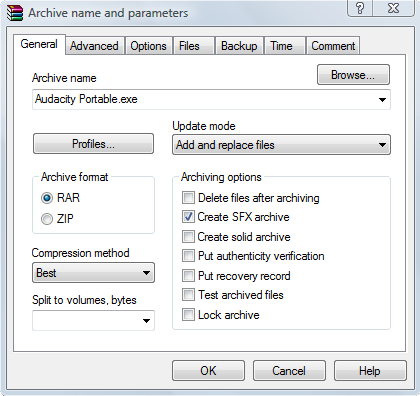
In the resulting dialogue box, name your archive “Audacity Portable” or whatever you prefer. Under compression method, select “Best”, and be sure to check “Create SFX archive”.

Know To Create Your Own Portable App For A Flash Drive

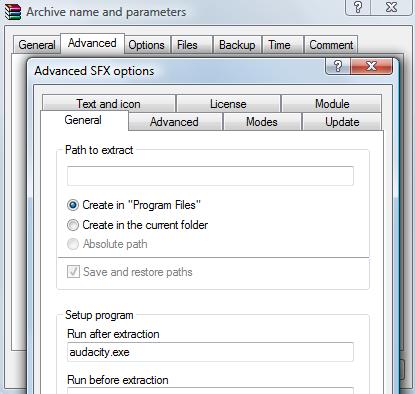
Next, click the ‘Advanced’ tab and click “SFX Options…”. In “Run after extraction” field, input the name of the .exe file that you located in Step 4. In my case, the name was “audacity.exe”.

Know To Create Your Own Portable App For A Flash Drive

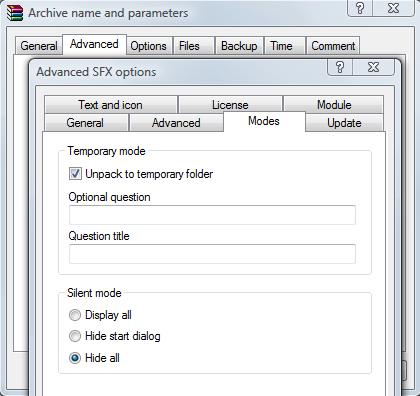
Head on over to the ‘Modes’ tab and select “Unpack to temporary folder” and “Hide all”

Know To Create Your Own Portable App For A Flash Drive

Lastly, go to the ‘Update’ tab and select “Overwrite all files”. Now go ahead and hit OK, and watch WinRAR generate an application file.

Step 6: Copy the file to your USB drive

This step is pretty self explanatory. Drag the application to your USB drive (wherever you want it to be) and then give it a test run! Double click the application to run it–on any Windows machine! This version of Audacity is Windows only.
So to sum things up, we essentially found a file we wanted, extracted it, and then repackaged it with a few of our own preferences thrown in. Every time you click the application, it’s actually going to briefly unpack the file into a few hidden folders so that the .exe has access to the resources it needs. This means that the app takes about 2 seconds or so longer to execute (depending on the size of the app), but it will execute seamlessly.
What do you think? Did this process work for you? I personally like this method, but there are others out there that can also work (like copying the entire program folder from the program files directory). Unfortunately, the other methods I’ve tried have been unreliable.
The general rule of thumb for the method I’ve shown here is that if the .exe in step 4 executes successfully, the process will also be successful and you’ll be able to pack it all into an application file. I hope you enjoyed this article and found its contents useful. Let me know what you think in the comments section!

PRASHANT KUMAR
Monday, September 24, 2012

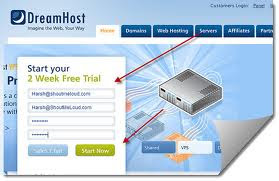
How to get a free domain name + 1 year free hosting from DreamHost


If you are thinking it’s a joke, it’s NOT. Here is a fully working trick to get a FREE 1-year domain name + Free Unlimited Hosting from DreamHost. Dreamhost is one of world’s most popular and reliable services.

We had tried this method and it worked flawlessly.

Follow the steps below carefully to get 1-year domain and Unlimited Dreamhost hosting Free:


How to get a free domain name + 1 year free hosting from DreamHost
Step 1. Sign up for Free Dreamhostapps account. Choose dreamhosters sub-domain in step1. In step 5 fill up your details and sign up.

Step 2. Visit http://kproxy.com

Step 3. Enter this URL, http://www.dreamhost.com/ into the text box and click on surf.

Step 4. Click on Sign up Now and choose to Host a domain.

Step 5. Fill all the information properly (use one year plan etc.)

Step 6. Very Important - While entering the address choose country as US and not IN. Also enter the same email address which you used for DreamHostApps.

Step 7. Use the Code BARCAMPLA7 for 100% discount.

Step 8. Enjoy!


Code BARCAMPLA7 (got this using Twitter search for “Dreamhost code”), provides 100% discount, but only for US locations ( so choose country as US ).

Do share your experience here. As always, p2ktech will keep sharing the fantastic tips and freebies  .

PRASHANT KUMAR

Related Posts Plugin for WordPress, Blogger...